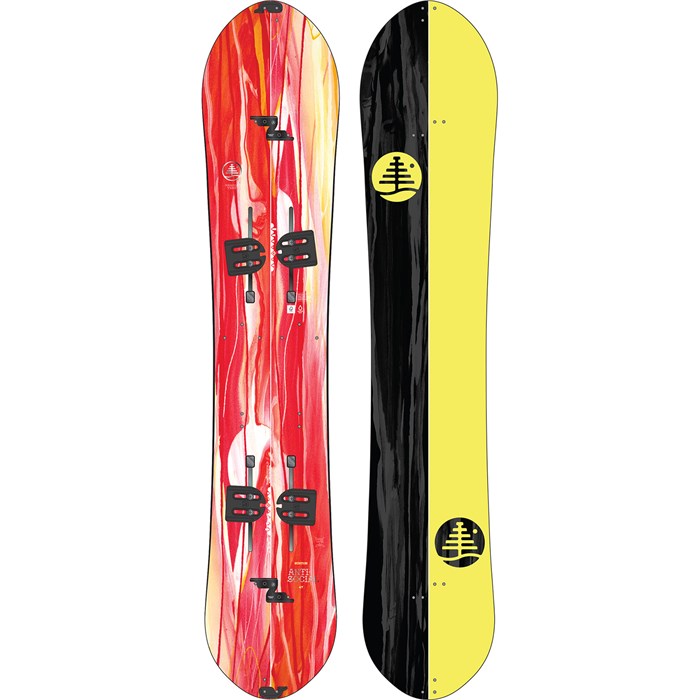
Burton Family Tree Anti-Social Splitboard – Women’s 2016
The Overview:
Up until a couple years ago, backcountry snowboarding was reserved for women willing to suffer on snowshoes or ultra-heavy men’s split boards. It was a painful, tiring affair that left little energy or enthusiasm to do what we came to do: snowboard down some rad lines. Now, women’s specific snowboards such as make it easy and enjoyable for us to get out into the wilderness.
The Test:
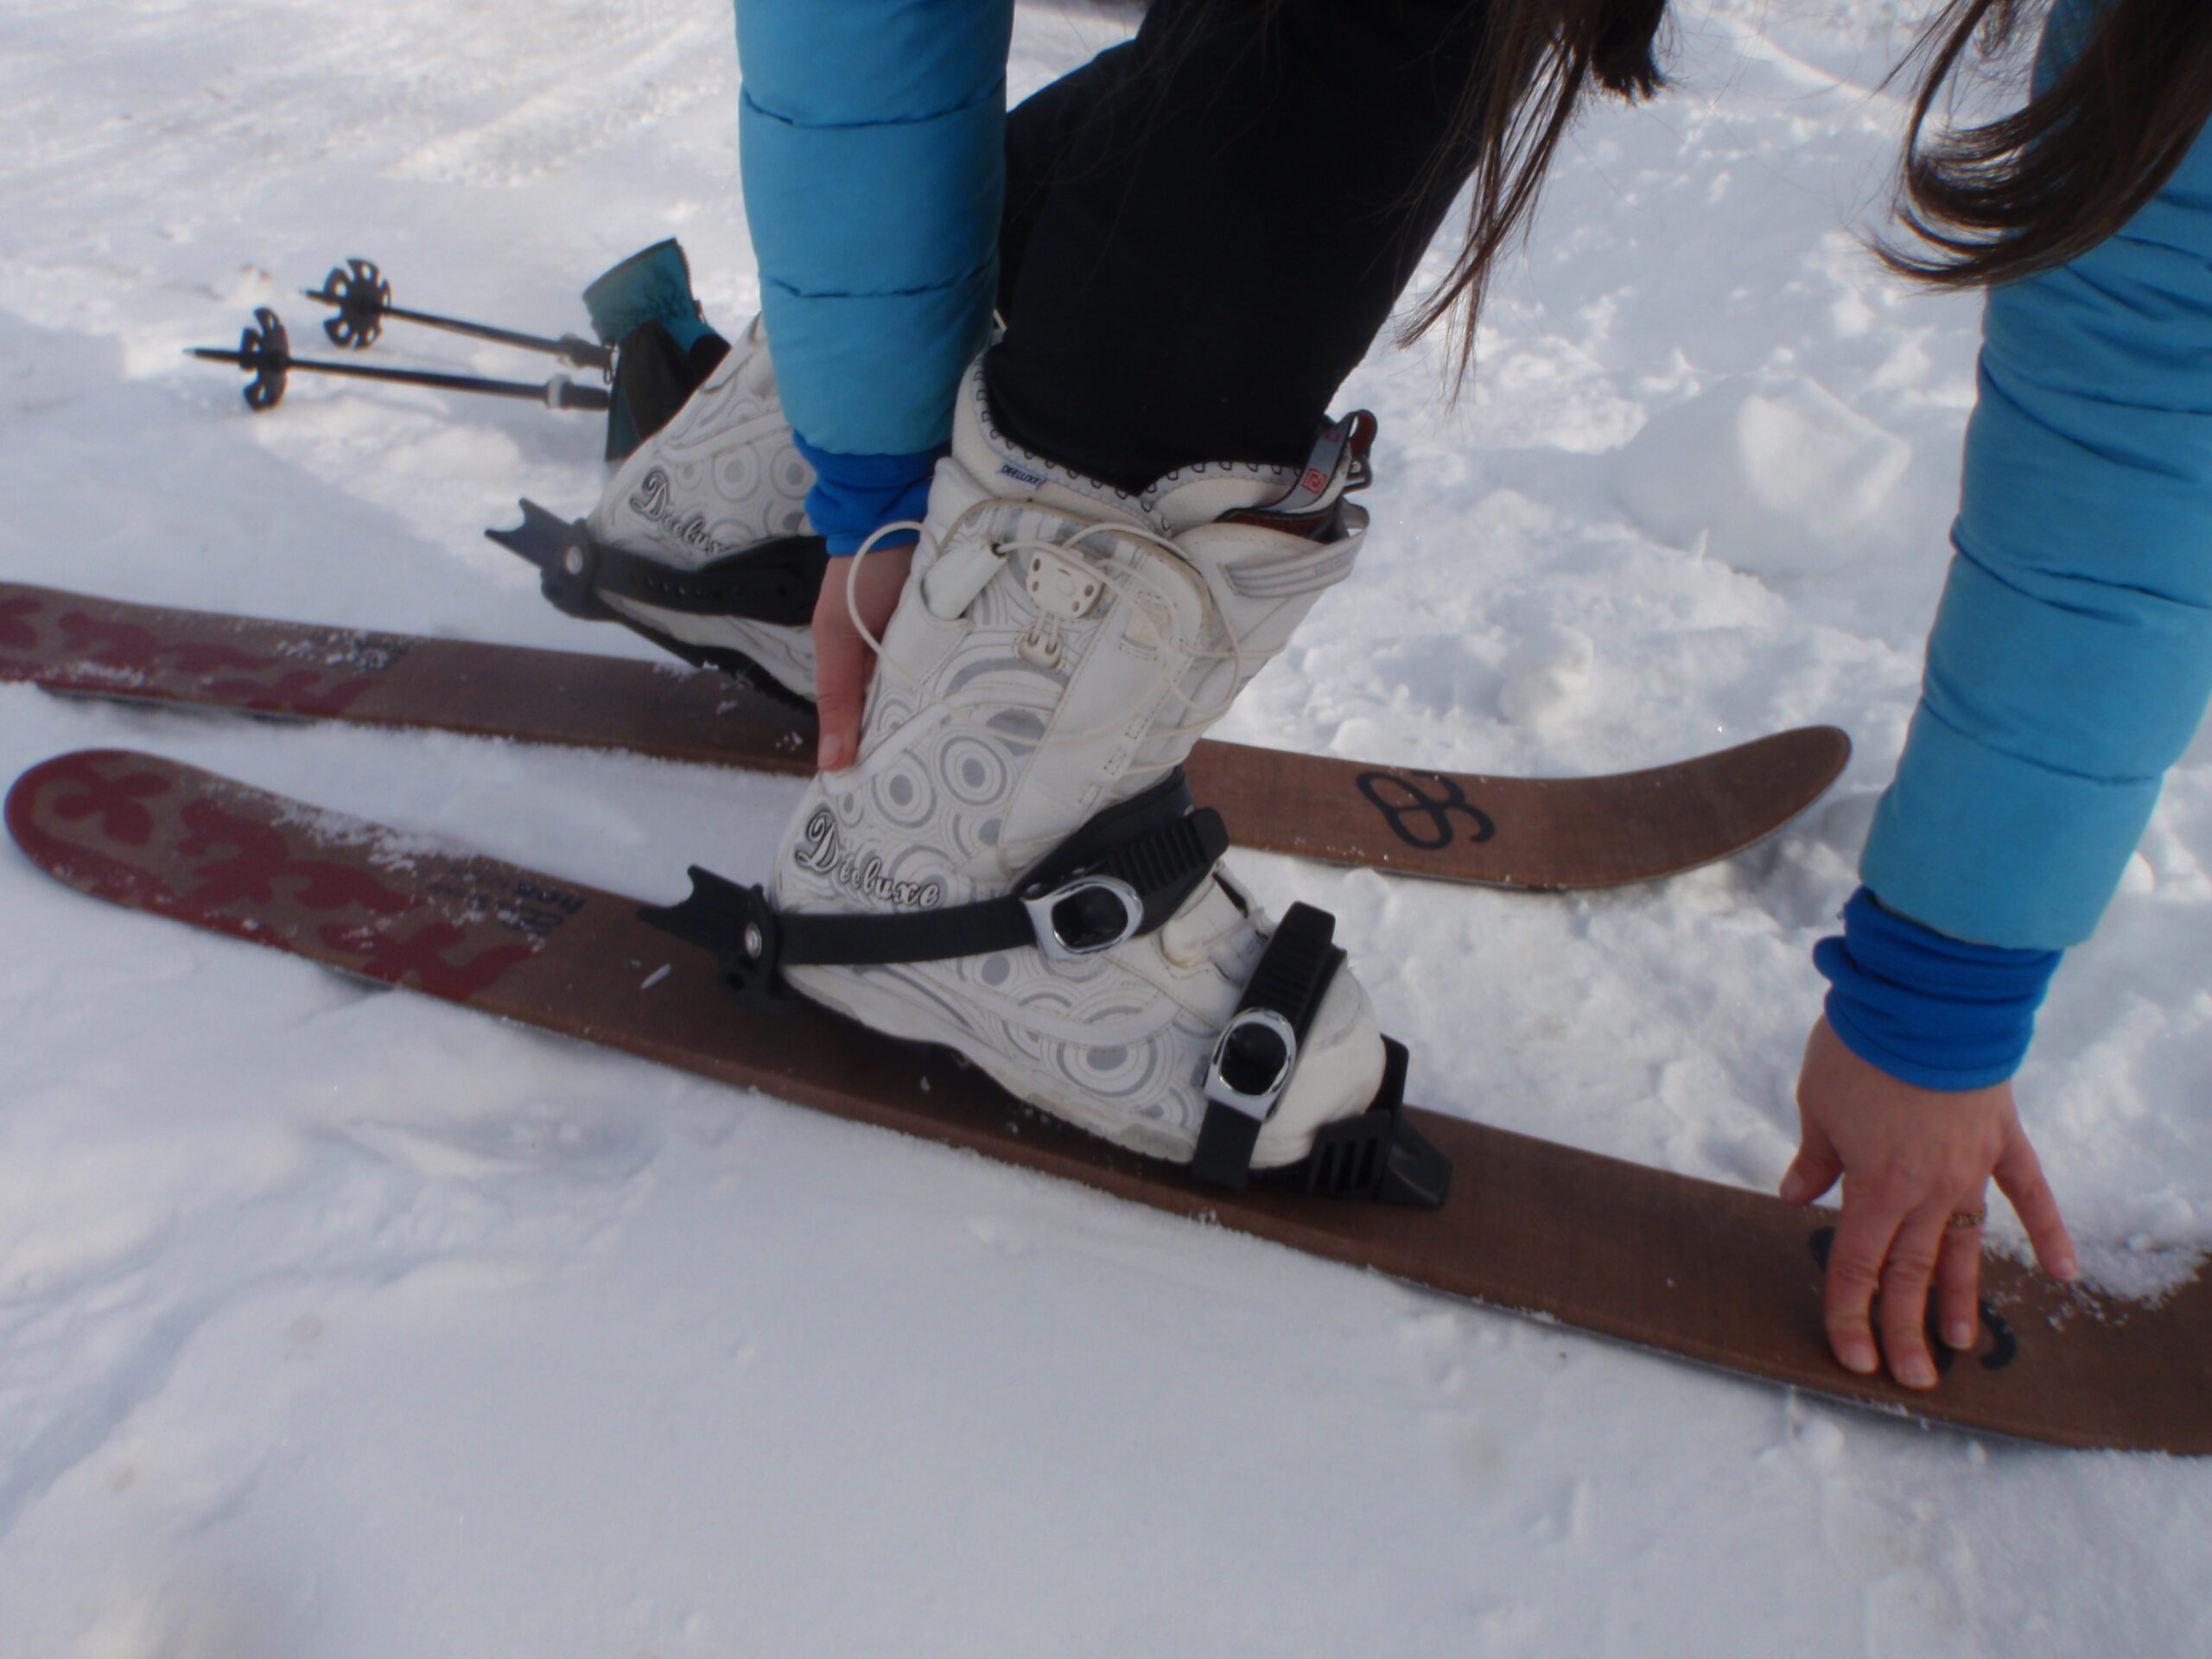
If this is your first time with a split board, as it was mine, I’m here to help navigate I’m happy to report it was quite easy. I do suggest having your local snowboard shop install the split kit. I like Radio Snowboard Shop, here in Aspen, Colo. If the board is in two pieces—you can set up your comfy snowboard bindings of choice to fit your regular boots—they simply slide into the hardware to position forward. Place skins on, with the metal clamps at the tip (forward), and then you have some fat skis ready to go up hill. There are two notches for a heel lift, depending on the steepness of your climb. The set up is designed to be lightweight so you can put in serious mileage both uphill and downhill.
For transitioning to riding: rip those skins off, slide bindings off and the board easily attaches together via four notches. Then slip the bindings onto the mounts to ride.
The S Rocker in the board lifts tips giving you good float in deep snow. But the board also features traditional camber underfoot and rides like a big mountain board, stiff in the right ways. It reminds me of my first Never Summer pre-rocker days. It carves in variable snow, i.e. chunder, and feels like you have a real board underneath your feet.
The first time I took the board out was to do an evening skin up Buttermilk. I got to the top around sunset with my puppy who is not into hanging too long in the cold. I was losing light, but it only took me six minutes to remove the skins, put the board together, and reposition my bindings. Not bad. Second try was more like four minutes. Because I went on my first split board excursions during a serious cold snap here in Colorado, I was worried all the fiddling would leave me with frozen digits, but in fact it was easy to handle in gloves so I would suggest having some thin liners around to use in transitions. I was also told by some experienced split boarders to spray Pam on the hardware, it keeps things lubricated in cold, dry weather.
What you’ll need for a proper backcountry split boarding session:
- knowledge of backcountry snowboarding (avalanche clinic or Avi course)
- backcountry pack with beacon, probe and shovel
- extra set of bindings
- adjustable ski poles
- Voile Split Interface Kit
- skins
- Pam for lubrication
- glove liners for putting board together
- mid-insulation layer to put on when riding down
Rating
5 (out of 5)
Note: We know we’ve been giving out a lot of top ratings, but as we test more and more similar products, we will evaluate past ratings and re-rate accordingly when applicable.
Design: Lightweight for the uphill, yet stiff enough for variable backcountry conditions. +1
Style: Pink, purple, red stained wood graphics make for a cool look. Not too girlie, not too manly. +1
Durability: A wood core and overbuilt design ensure this board stands up to the test of time. +1
Performance: The ease of transition from split board to snowboard, plus the duality of the snowboard’s riding capabilities, ie rocker tips and camber underfoot, makes this board a top performer. +1
*Innovation: The snowboard when combined with the Voile Split Interface kit, is a true game changer for snowboarders looking to leave lift lines and crowded slopes behind them. +1
Buy Burton Anti-Social Split Board and Voile Split Interface Kit.


